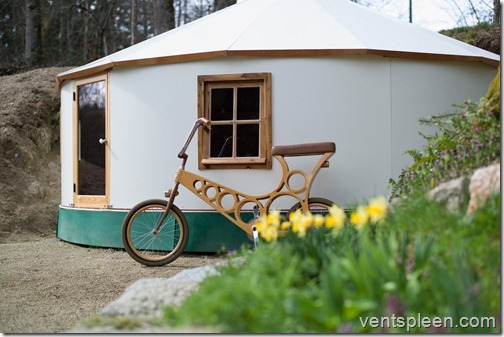
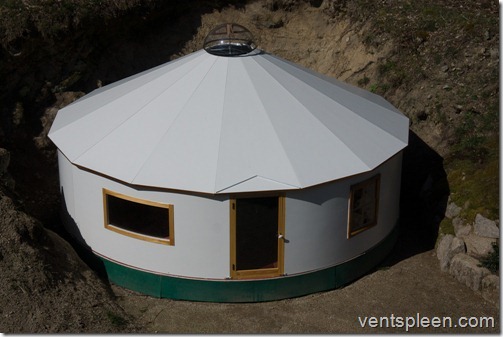
The Plurt lightweight yurt with the Hoopy.
One day I will try to write a book about design. I find the subject so fascinating and although I never formally studied it I have a good eye and apparently quite an imagination. Plus I love to problem solve, to find solutions to insolvable issues. I believe there is always a way to get something to work. Sometimes the solution is a bit complicated. Other times it is simplicity personified.
There are two ways to design something, either start with a blank sheet or use what is to hand or easily available. The first option will bring the fantastic vision of the designer to reality but it will take a very long time and be very costly. The latter option is more practical and sensible but may end up compromised aesthetically. As someone who designs creations that must be practical and easy to make I cannot take the first option, instead I need to find simple and inexpensive solutions which do not spoil the overall look of the finished product.
Sometimes however common materials come together and get repurposed so well that one can only admire the simplicity of it all. That was my goal with the Plurt. But also I wanted to add another dimension to the design brief which was minimal waste. This means using a material in its entirety or thinking carefully about what to do with any waste left over.
It just makes sense to me to use materials as they come and not have to work on them. It speeds the process and reduces waste to zero. I would make the Plurt using thin ply around a wooden frame with bonded XPS to act as insulation and to add strength to the panel. From working out how much a piece of ply could be bent I reasoned I’d need 6 wall panels which would create a 5 metre diameter circle 1.2m high. The ply would not even need to be cut down.
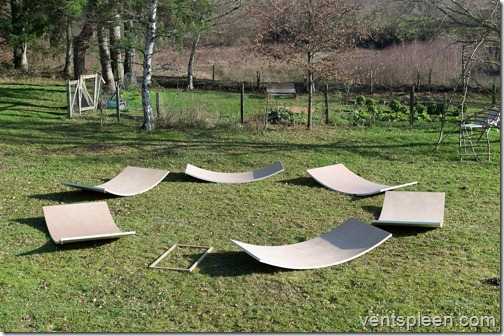
The six curved wall panels and door frame.
Of course creating curved shapes is much harder than making straight ones but as a boatbuilder with many decades of experience making things that aren’t flat is as easy as kiss my hand (as Jack Aubrey would say) to me. A jig would be required but as there are 6 panels to make it would be time well spent making one. It would allow the making of 6 identical panels which would ensure a good fit and if they were all the same then they could be interchanged allowing for different configurations with windows and such.
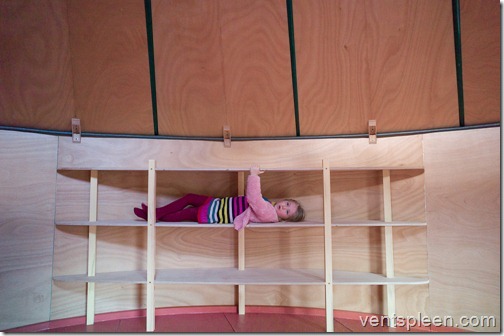
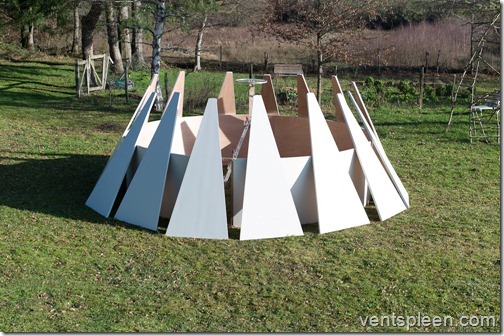
The only downside to a jig is what do you do with it after the panels are made? In the case of the Plurt the wall panel jig is modified and becomes the jig for the roof panels. Once all the panels are made the jig itself becomes a table or a bed for your Plurt and the curved cut out pieces are turned into a free standing shelf unit. No waste.
The shelves made from the jig. Strong and stable.
Each wall panel has locating pegs which not only hold the panels in the right place ensuring a good fit and seal but they also help to distribute some of the load from the roof. Once the panels are put together clamps pull them tightly together. The clamps act in much the same way as the wire that encircles a traditional yurt but as the entire roof of the Plurt only weighs 150 kilos, the forces on the walls is considerably less.
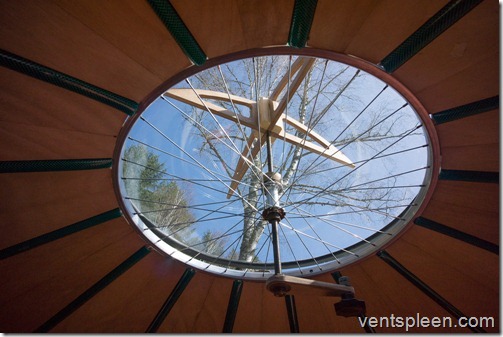
Designing the roof panels was much more challenging. They are flat but trapezoid in shape and have slightly angled sides so that they sit against each other well. They all fit in to a standard 700c bicycle wheel at the top. Traditional yurts have a large and heavy wooden crown and all of the many roof poles are fitted in to it. It’s one of the reasons why putting up a traditional yurt is not a one man job. I wanted to find a better way.
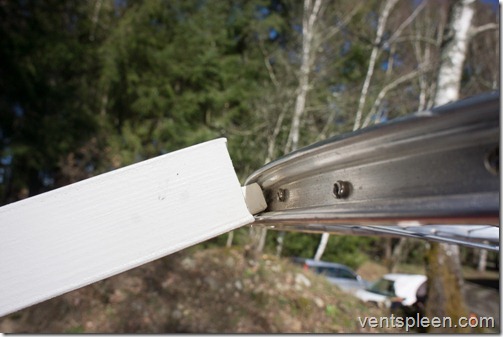
See how the tenon sits beautifully in the wheel rim and cannot lift out.
A 700c wheel is about as big a bicycle wheel as you can get and it is a very common size. In designing I find there is a lot of luck. For example when I was doing my experiments to see what I could do with the roof I needed to get the tenon in the end of the roof panel to sit inside the bicycle wheel rim. I had imagined needing to cut a special shaped tenon but as it happens a simple rectangular shape sits beautifully inside the rim when the roof is at its final 26 degree angle. Nice when that happens.
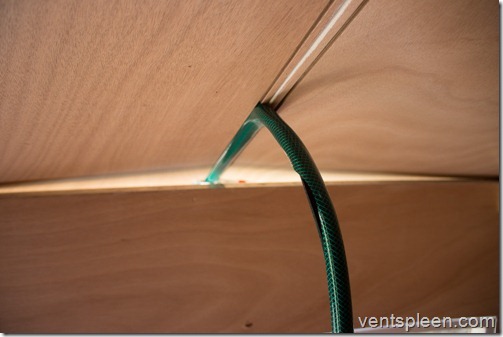
Apart from getting the size and shape of the roof panels right there were many other issues, for example, how would I fill in the inevitable gap between the roof and wall panels created when you place a flat object on a curved one? How would I waterproof the 15 joins? That’s 40 metres of potential leaks! I did some quick experiments and discovered that a simple guttering made from garden hose worked just fine and even held itself in with friction alone. I was very happy to solve this one so easily.
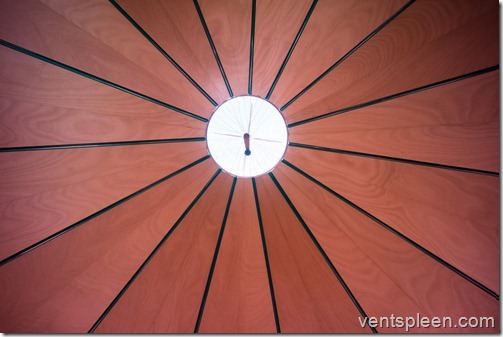
A worm’s eye view of the roof.
There are many reasons to use garden hose as guttering. It fits in with the low cost and easy to find ethos for a start but it even works on an aesthetic level too as the gutters mimic the poles that you would find on a traditional yurt and helps to break up the large wooden surface. Bottom line? It looks good. It looks right. Other advantages to this system apart from the low cost are that these same gutters can be used to carry cables to the roof should you want a fan or lighting up there. But best of all it allows for a nice margin of error. If the roof panels are not 100% and there are some gaps between them, it really doesn’t matter because the hose just expands slightly to take up the slack.
Calculating the size and shape of the roof panels was not easy but harder than that was trying to minimise waste. For a long time I juggled with different sized panels, more or less panels and different roof angles until I finally found the compromise that would allow a good roof angle but just as importantly the right size that would allow the off cuts from one side of the panel to be used on the inside. A traditional yurt typically has a roof angle of 30 degrees so I was not unhappy about getting to 26 degrees.
The 15 roof panels leaning against the walls.
Initially I imagined the roof panels would also have some kind of locating device to ensure that they couldn’t move or slip plus they would help to spread the forces but due to the way the panels are fitted when the roof goes up, it just wouldn’t work, so that idea had to be abandoned. It seemed to me that once the whole thing was assembled and sitting right, the tops of the panels would all lock in to the bicycle wheel at the top and the supporting knees would lock in the lower end and once the clamps were added to the lower end it would have sufficient stiffness.
The next issue was how to assemble the roof on top of the wall panels. Traditional yurts often have a central scaffolding which is later removed so I decided to mount the wheel on a post in turn clamped to a simple step ladder. Obviously the wheel has to be mounted centrally to ensure the roof has equal overhangs. There is always a little margin for error of course but not much. Part of the compromise of the minimal waste design meant that there would not be much overhang so it had to be placed pretty accurately. the solution to this was to use a plum bob hanging from the post and pointing at the very centre of the yurt base.
Once the wheel was centred and at the correct height another advantage to this system came to light. Originally I assumed that the panels would be pushed in to the wheel from the outside and as they are triangular the gap would close as they went home but an unseen advantage of the tenon at the end of the roof panels is that they can be dropped in and rest on the inner rim of the bicycle wheel before being pushed home. This means the panel is supported while you adjust the last few millimetres.
Note the roof panel centrally placed over the door with added rain diverter.
Bear in mind that it’s one thing to make a structure like this but it is quite another to find so simple a way that it can be documented and explained for the builder. Seems that luck was on my side once again. The first roof panel is fitted centrally above the door frame. This was not my decision but arrived at because if there was a join at the door there would be a gutter dripping water on you as you went in when it was raining.
To keep the weight even on the bicycle wheel, the roof panels are assembled one at a time and the next panel is fitted opposite the last one and so on until all the panels are fitted. The roof panel that fits opposite the first one just happened to line up with the end of one of the wall panels so it is an easy thing to describe. The roof panels go in until there are two spaces left. One of the gaps will be too big for a panel and the other too small. A roof panel is fitted to the larger gap and then the rest of the panels are just shuffled across a few millimetres until the last gap is just big enough for the last panel to be dropped in.
At this point the panels are clamped together. There is one clamp at every join nicely hidden at the lower end. Now the roof is pretty solid and yet still not actually fixed to the walls and this is where the knees come in. They have slots in them so they can be adjusted. Once the roof is up, the knees are loosened and a shim is placed behind them so that the next time the Plurt is disassembled all you have to do is remove the shim, the panel will drop down slightly opening the gap and the tenon will still be resting on the bicycle wheel rim. Now it can be pushed up and lifted out. As the roof panels are only 10 kilos each it’s not a hard thing to do.
The adjustable plexi dome fitted through the hub of the 700c bike wheel.
The next job is to fit the dome but how can you do this when the bicycle wheel is on a step ladder and has a bolt fitted through it? You can’t. first the scaffolding needs to come down. Once the roof is free standing the mounting bolt fitted to the wheel can be removed making space for the dome which is fitted using a threaded lead bar. But how do you get on the roof to drop it in? You can shimmy up the roof and place it in that way as the roof can easily take the weight but there is a better way.
Simply remove one panel. The roof stays up just fine even with the odd panel removed. Then get the ladder and pass the dome through the big gap and drop in into the hub of the wheel. Now the panel can be refitted and reclamped.
Fitting the guttering in to the grooves in the roof panels.
Now the Plurt is erected but not fully assembled. The internal guttering needs to be fitted. It’s an easy task but does take a little while as there are 15 x 2.5 metre length gutters to fit.
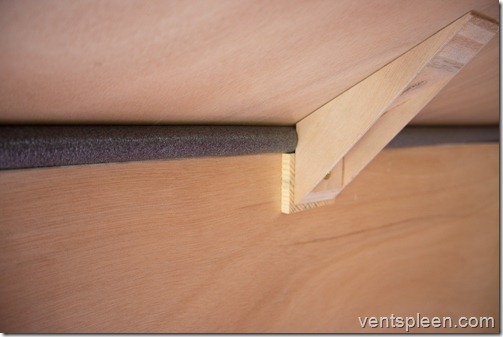
Sometimes the best solutions are the simplest. Foam pipe insulation fits perfectly.
The gap between the roof and wall panels was still unsolved at this point. Sometimes when you do not have a solution it’s best to stop thinking about it and often this way a solution will appear and that is exactly what happened. Turns out the perfect material for the job was some foam pipe insulation. It’s a neutral grey colour and can be forced in to the gap making a very respectable seal. It’s perfect and fits the easy build ethos. It’s cheap and readily available and comes in one metre lengths which, believe it or not, is exactly the distance between the roof panel knees so they didn’t even need cutting down to fit. Sometime the design gods are on your side. A perfect solution for what had appeared a really difficult problem to solve. it’s often this way with design. Often what you think will be the hardest problems to solve turn out to be the easiest and vice versa.
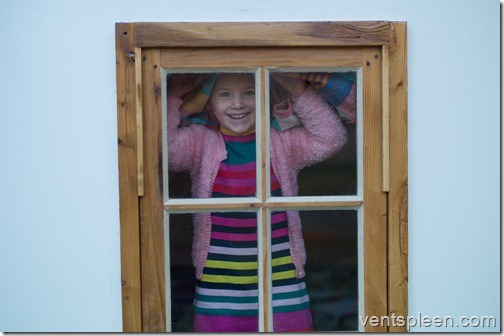
In the Plurt you can fit opening windows anywhere.
Now that the Plurt is fully assembled and weather tight it’s time to fit the windows. This is just much easier to do when the walls are in place and firmly held. Unlike a trad yurt which has an interior lattice the Plurt can have opening windows anywhere in any panel. This is important because a yurt needs good ventilation. As the wall panels are identical you can move the window lay out around if you fancy a change. Not something you can do on most yurts.
The Plurt has many advantages over a traditional yurt and perhaps the biggest is that it does not have a fabric skin. No doubt it’s a good watertight system but it doesn’t allow easily for openings and will eventually rot away in the sun. The Plurt is simply painted plywood so when the paint is getting a bit tired, all it needs is another coat and it’s good for the next few years. replacing a fabric covering for a 5 metre dia yurt is a costly undertaking to have to make every ten years whereas a tin of paint doesn’t cost much in comparison.
The advantages keep coming. If you wanted to make a traditional yurt yourself you’d probably come unstuck at the fabric stage. Unless you have a large clean space and an industrial sewing machine you simply won’t be able to make the covering and having done some heavy duty canvas sewing I can tell you that sliding around a 20 sq metre piece of cloth is very hard, even the professionals struggle. This simple fact alone means that a diy yurt is out of the question for even the most resourceful of people. And consider how hard it is to fit such a cover to a framework standing 3 metres high. Doing away with the fabric is the first step in being able to offer a diy yurt.
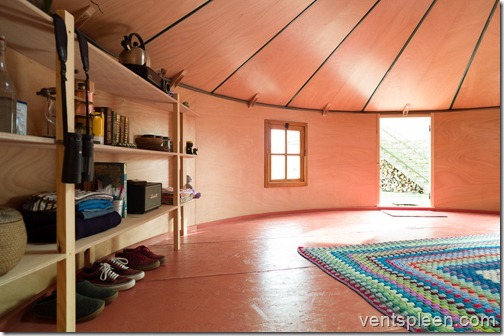
The very cosy and bright Plurt interior.
Another advantage to having no fabric is that it’s easier to have windows that open. Not only that they can be made of glass which is much nicer to look out of than the transparent plastic fitted to most yurts. You can even fit salvaged windows in the Plurt.
None of the panels are long nor heavy so it makes the Plurt much easier to assemble, even alone and it makes it easier to transport and store. Less materials means less cost. The Plurt typically costs about half that of a similarly sized traditional yurt.
Despite the Plurt’s light construction it does not feel flimsy at all. It does not move when the wind blows and the insulation dampens the noise of the rain although you always know it’s raining when you’re in a Plurt.
As I said at the beginning of this post, design is a fascinating subject and it’s amazing how by choosing certain important criteria before you start can have such an effect on a design. There really is very little waste when you build a Plurt and that is a good thing. We all need to be more conscious of how we use the planet’s valuable resources and reducing waste and building in wood is a good place to start.
How many other small dwellings can be built so cheaply and be taken apart in minutes? And on top of all that there’s the element of being in a circle, the calm that it brings compared to straight lines and right angles. All in all I am very pleased with how the Plurt has turned out. It’s a lovely space to spend time in. It could be used to live in, or as an office, a kid’s playroom, a yoga space or even rented out to earn a living from it. Having created the design and spent months perfecting the plans it’s now up to others to decide how they will use their Plurt.
Why Plurt you ask? It’s PLywood yURT but later I discovered that it also stands for P.L.U.R.T. Peace, love, unity, respect and trust. Nice. Plurt it is.
