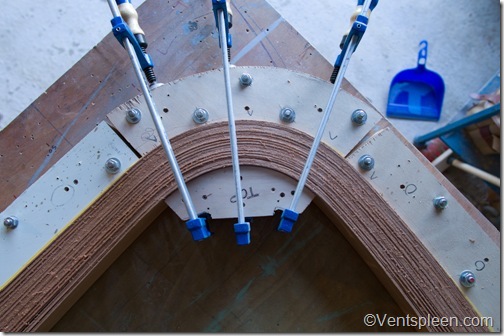
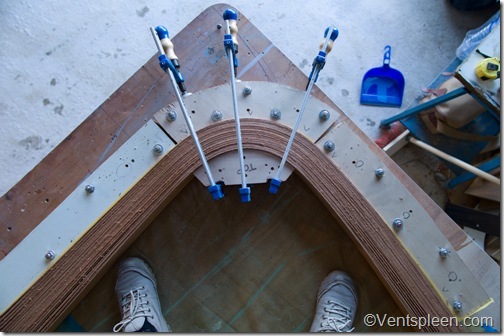
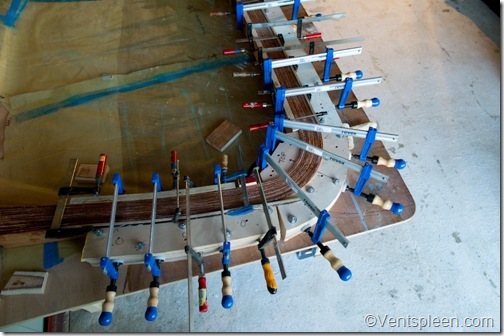
Over 30 strips of 2.5mm in place on the jig. This is just a dry run to check that every thing is ok.
There are many ways to bend wood but it will depend on the job that you want to do as to which method you will use. For example if you only want a slight bend, maybe simple brute force will be sufficient but it depends on the size of the wood. No amount of brute force will bend a foot square section of oak for example!
Thinner wood bends easier than thicker wood and some woods bend easier than others. The greater the curve, the thinner the wood needs to be. These are all basic rules that cannot be broken but if you know what is possible then wood can be shaped into almost any form. Even time can bend wood as can heat and moisture. Wood really is an amazing material.
As wood bends, the inner section compresses and the outer section expands. Sometimes it is possible to stop the wood breaking as it is bent by placing a steel band around it as it is bent into shape, in much the same way that a plumber inserts a steel spring into a copper pipe in order to bend it without it kinking.
Steam, or in fact any kind of heat can be used to bend wood but it helps if the wood is green, or in other words, freshly cut so it contains more moisture and is naturally more flexible. But steaming is only good for relatively thin sections of wood. So what does one do if you want to bend a larger section?
Well, it depends on how much you want to bend the wood. It also depends on the orientation of the grain and as I mentioned earlier on the type of wood. Often brute force and time can bend quite substantial pieces of wood but these days people are in a hurry and can’t wait months for gravity to do its thing.
Perhaps the most effective way to shape wood is to laminate it. This is done by gluing thin strips together using a jig to create the shape required. The thickness of the wood required will depend mainly on the radius of the curve required. The greater the curve, the thinner the strips will need to be.
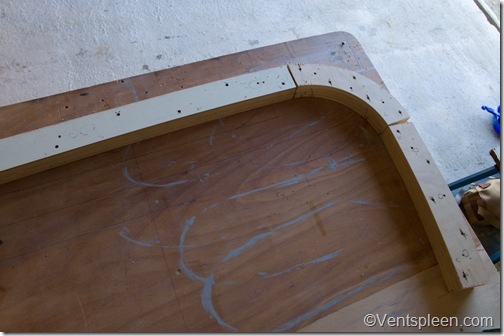
Making the three sections of the jig from layers of 20mm plywood. This jig was made in three pieces because there are many knees to make and they are all slightly different. By keeping the curved section the same, only the other pieces need to be modified each time.
The down side of laminating wood is the fact that you have to make a jig and use glue. You can use almost any kind of glue but for the best and strongest results it’s best to use epoxy. The trouble with epoxy is that it is messy and expensive. That said, once the jig is made it’s easy enough to bang out any number of glued laminations.
Recently I was called in to reinforce a 20 metre wooden sailing boat. The deck had lifted due to the compression forces of the mast and rig and in order to put more strength into the boat new and larger hanging knees were required. So that the knees did not intrude into the boat too much they needed a fairly sharp radius but as they were 75 mm square that meant that they would need to be made from very thin strips indeed. In fact sometimes laminations can be made with wood as thin as one millimetre!
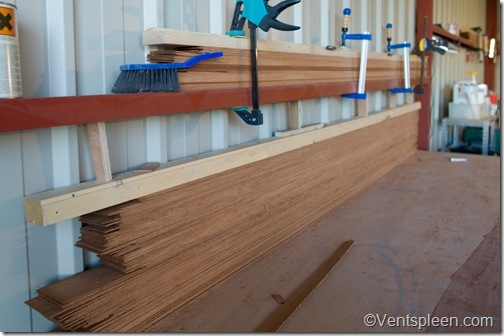
Just some of the strips of mahogany cut to make some laminated knees.
In this case it was decided that 2.5mm would be about right. The ideal is to use the thickest laminate possible as it requires less work and less glue and arguably looks better as there are less glue lines visible in the finished product. 2.5mm wood bends very easily even into a very tight curve but once you pile a load together it becomes much harder. It’s not so much the physical limits that you can bend the wood too but more the force needed to force a stack of laminations into the jig.
To create a 75mm thick knee, over 30 strips of wood were required and because there is quite a lot of force involved, the jig needs to be pretty strong. The jig was made from 4 pieces of 20mm plywood stacked together to create a support for the stack. The wood is actually cut about 8mm thicker than required as it will need planing down on both sides afterwards. When the wood is in the jig, it is slightly proud of the jig. This enables it to be bashed or clamped down into place.
The jig was made in three pieces and then they were bolted through the work table with 10mm bolts to ensure that nothing can move. Where the wood bends around the most, an inner block was also made to ensure that the clamping pressure on the curve was even.
The inner block is crucial to a quality lamination. This ensures that there are no visible glue lines in the finished product. The other areas are easier to clamp.
When the jig is made it’s time to do a dry run. This is to ensure that you will have no problems when you come to actually glue it up. What you do not want is to discover a problem half way through gluing. Epoxy is unforgiving in this respect. If it goes wrong, the wood will be glued like that forever and since epoxy, wood and your time is expensive, it’s worth taking a little while to do a dry run just in case. If the dry run is successful, remove the clamps and the strips and prepare some epoxy.
The stack is laid down on its side and the first strip is coated in glue. I always mix in a little thickening agent to ensure that the epoxy has a little flexibility and also to ensure that the epoxy goes on thick enough. Making sure you use the right amount of glue is a matter of experience but it’s certainly better to use too much glue rather than too little! Once the first strip is coated with glue (using a roller) the next is laid on top and then that is coated and so on until you get to the end.
Then the stack is placed into the jig which has been lined with plastic to avoid the assembly from gluing to it and thus making it impossible to remove once the glue has cured! The stack is clamped in place starting at the centre of the curve. As the first clamp is tightened a little, it’s worth bashing the stack down onto the work surface. Now work outwards in both directions clamping and bashing as you go.
The laminations, glued up and clamped in place. Leave to cure for 24 hours before removing.
If you have used sufficient glue and enough even pressure from the clamps you should end up with a solid piece of shaped wood that doesn’t even look like it was made from many pieces. Once it has been in the jig for 24 hours it can be removed. It is possible that the finished piece will ‘spring’ that means that it may open slightly as it tries to go back to its original shape. The more laminates you use, the less chance there is of the laminates springing.
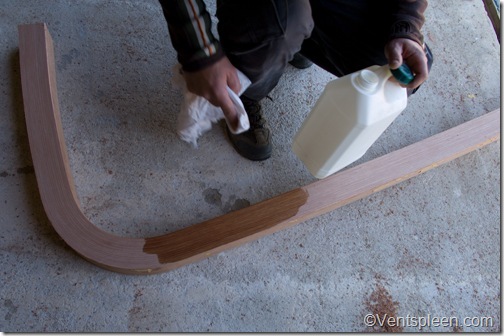
Once out of the jig, an electric plane is the ideal tool for removing the glue that has hopefully squished out from between the strips. A belt sander also works well though sand with progressively finer grades to ensure that no scratches are visible in the finished product.
The knee, planed down and sanded. A bit of spirits on a rag show how the knee will look once varnished.
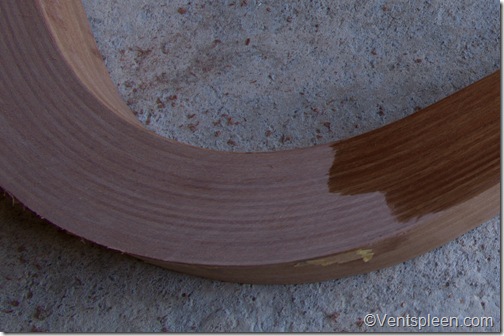
If you want to get really carried away you can assemble the stack for gluing so that the colour of the wood is uniform. Often wood, even from the same tree can be different depending on the direction or orientation of the grain so you can disguise the fact that a beam is made of many pieces by carefully matching each strip to the one above it. In reality it’s not really worth it unless you are trying to create something really spectacular. In time, most woods with either darken or lighten with exposure to sunlight which will make the colour more even.
A close up of the curved section of the knee. No glue joins are visible but it is possible to see a slight difference in colour of some of the laminations. In time these will fade slightly until you’ll have to look closely to see if the beam is made from many pieces.
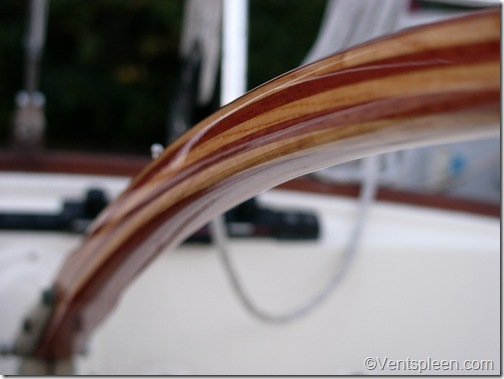
You can of course make a feature out of using different woods in a lamination. Often boat tillers are made like this. It’s a bit cheesy but it does show what’s possible. Laminating wood is a great deal of fun and also very satisfying. It is also quite amazing how a stack of thin strips of wood that were collectively very floppy suddenly become unbelievably strong and resilient once glued.
Laminated tiller on a Dana 24. This one is made from mahogany and ash.
