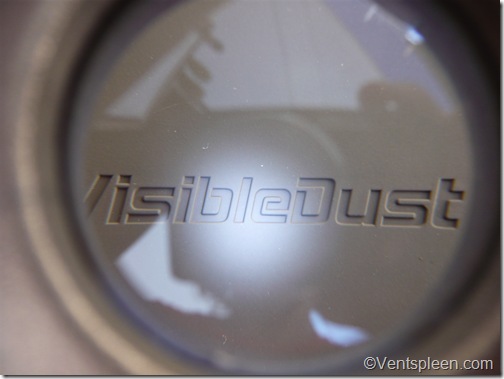
The view through the Visible Dust loupe. Note how the 6 led bulbs focus in the centre.
It’s been a couple of years now since I bought a Leica M9 and it’s taken me that long to finally get good results cleaning my sensor. I don’t expect perfection, after all, the odd spot is easily removed with Lightroom. But this is not the point. The cleaner you can get your sensor, the less time you spend touching up pictures. It’s not too much of a chore if you only have a few pictures but when you start dealing in the hundreds or the thousands, that is another matter. The time you can save is massive.
There are some manufacturers whose cameras offer various ways to keep the sensor clean such as ultrasonic vibrations etc but the M9 has nothing at all. If you don’t change your lenses often you might not ever see much dust but as soon as you take a lens off you are inviting dust into your camera. There is really very little you can do about this. The obvious things are to hold the camera upside down when changing lenses, make sure the caps and the lenses are kept clean. Don’t put a lens in a pocket or the dust that it picks up will find its way into your camera and onto the sensor.
Also it doesn’t help that I am a dusty person. Where we live it is generally dry and dusty. Sometimes it’s windy too and that moves things around. When I first began trying to clean my sensor I tried a system called a Dust-Aid. Many people claim to get good results with this system but I found it to be a complete joke. It put more dust on the sensor than it took off and it had the habit of leaving marks on it too. The Dust-Aid is supplied with some sticky strips. The idea is that you press the wand onto a sticky strip which removes the dust from it so that it is clean when you place it on the sensor. The strips were statically charged and it seemed to me that they were just attracting dust. The company who sold it to me said that I was being incompetent or my environment was too dusty. Or I was.
As I had so little experience cleaning sensors I had to assume that what they said was true. Since then I have discovered a few things. One of them is that despite being a dusty person in a dusty environment I am now able to get my sensor very clean so I now do not believe that it has anything to do with me.
I also believe that if you can clean a sensor without touching it in any way this has to be the best way forward. Why risk damaging such a delicate piece of the camera by touching it if you don’t have to? Obviously you are not cleaning the actual sensor but the low pass glass filter in front of it but it is still delicate and easily damaged.
After the disaster with the Dust-Aid I tried other systems. One of them, the Green Clean system was offered to me by the Leica dealer. This system sucks dust from the surface using a compressed air canister to create a filtered vacuum. The trouble is that it’s just too easy to touch the sensor with the hard plastic end and it also requires that you can see the dust that needs removing. I soon gave up with that but I did sometimes use the compressed air to quickly blow the dust off the sensor or lens and caps when changing lenses. This did help to keep dust down but using compressed air is fraught with potential dangers. Sometimes the can sprays out propellant and that can damage the sensor, or cover it in crap so that you then have to clean it. You cannot fly with compressed air, even in checked in luggage so it’s not really ideal.
After this I tried the swab and chemical route but every swab I tried just left dust or tiny lint particles from the swab on the sensor. What I learned is that some chemicals and cleaning solutions and swabs are better than others. I bought one kit recently in desperation as I couldn’t find any other system where I was and it came with paper swabs and a pen with a brush on one end and a pad on the other. As before I was not able to get the sensor clean and every time I passed with the swab I was aware that I was touching the sensor unnecessarily. All very nerve wracking just before an important photographic commission.
A 100% crop of the top right hand corner. This picture of the sky is clean. Not a speck of dust in sight. Result. This was after using every tool in the bundle.
At that moment I decided that I was not going to stand for this any more. It is amazing that camera companies do not either recommend or sell a decent sensor cleaning kit for their cameras. It is as if they don’t even know. Maybe it is different for every camera and user? All I know is that it is very hard to get a clean sensor. So after 2 years of experimentation what system do I use now?
Well, one of the first things I can tell you is that it’s a multi stage process. not one system will get the sensor as clean and dust free as you might want but a combination of them will.
The first thing to do when cleaning your sensor is to take a picture of the sky at f16. Then take a good look at it on the computer at 100%. Look especially in the corners as they seem the hardest to clean and also where dust seems to collect most.
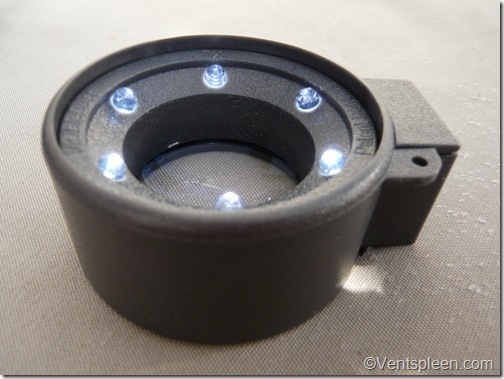
A 7x magnification and 6 bright angled leds makes this an excellent tool for a good close look at the sensor.
The most important thing, apart from a dry, dust free and windless environment to clean your sensor in is light and a way of magnifying the view so you can really get a good close up view of the sensor. I bought a Briteview light and loupe from Visible Dust
This is essential for getting a good look at the surface of the sensor. It has 6 angled led bulbs which light up the sensor well and evenly and magnifies by x7 which is about right. The lens is clean and sharp. It’s a nice bit of kit, powered by two small batteries (supplied) and it comes in a foam padded plastic box which keeps it clean and dust free. Obviously you don’t want dust falling off the loupe so being able to put it away after every use makes a lot of sense. I can’t really over emphasize the importance of keeping your tools, lenses and caps as clean as possible. You’ll never stop dust 100% but with care you can keep it at a reasonable level!
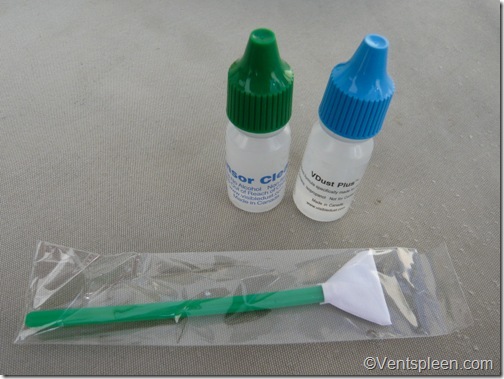
Two cleaning products, one water based and the other alcohol. The padded swabs are excellent and practically lint free. The chemicals work well and evaporate quickly leaving no visible drying marks.
If the sensor has drying marks or grease (from the shutter maybe) then you will first need to get this off. You don’t want to smear oils about on the sensor, or worse pick them up and contaminate your brush. I bought two types of cleaning product from Visible Dust. One is a soapy kind which cleans and the other is an alcohol based product that degreases. Both may be needed depending on what kind of dirt you have on your sensor.
For the swabs I bough Visible Dust’s Ultra MDX-100 which are made from lint free fabric. They are superior quality to anything else I have seen or used before. They are slightly padded and are the best I have used.
I started my clean with the V Dust cleaner and a swab. I was impressed with the way the swabs felt and how well they wiped across the surface. The liquid dries quickly on the sensor and leaves no drying marks. This has not been the case with the Eclipse fluid that I was using before. I was less impressed with the plastic packaging Visible Dust use in all their products. I would prefer to see a more biodegradable packaging.
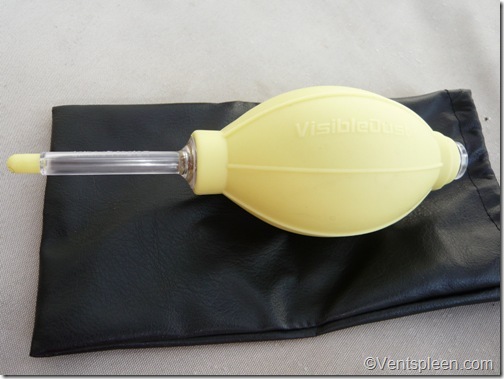
The Zeeion blower has two filters ensuring no dust gets blown into the camera. Comes with soft tip end to avoid accidental damage and a little carry bag. New internals can be bought when the filters are clogged.
After this, I swabbed with the water based version. Now that the sensor was clean, I could start to see about the dust. The first thing I do is take a look at the sensor to see how much dust there is on it and where it is. Then I hold the camera upside down and use Visible Dust’s Zeeion blower. This is a hand held blower that you squeeze to force air into the camera. It differs from others I have seen as it has two fine filters, one that filters the air being sucked into it and the other which filters the air that you blow into your camera. It is surprisingly good at removing most of the dust but it cannot get it all. Sometimes dust is surprisingly sticky and blowing it just isn’t enough and there is always the risk that you will just dislodge some dust from somewhere else and it will find its way onto the sensor.
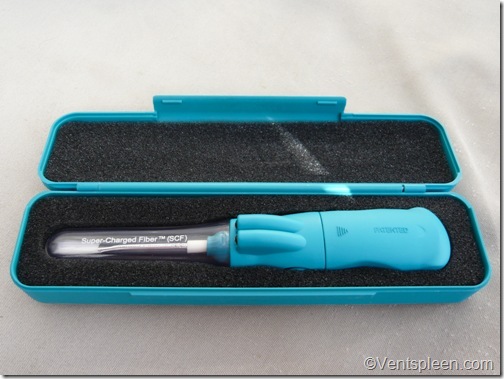
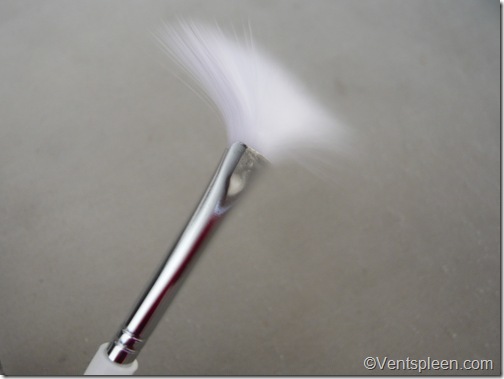
The Arctic Butterfly. Odd name but clever product. The bristles are charged to attract dirt by spinning the brush at high speed.
The final solution is to use the Arctic Butterfly. Don’t be put off by the strange name. This is a clever and obvious tool. It is basically a very fine brush attached to a battery operated handle. The way it works is this. You spin the brush at high speed for 5 to 10 seconds. This does two things, it flings off any dust that was stuck in the bristles and it charges them to attract dust so that when you wipe the brush over the sensor surface dust particles stick to it. (you do not spin the brush on the sensor!)
The Arctic Butterfly spins the brush at high speed. This dislodges accumulated dust and charges the bristles to attract dust like a magnet. Do not spin the brush on the sensor!
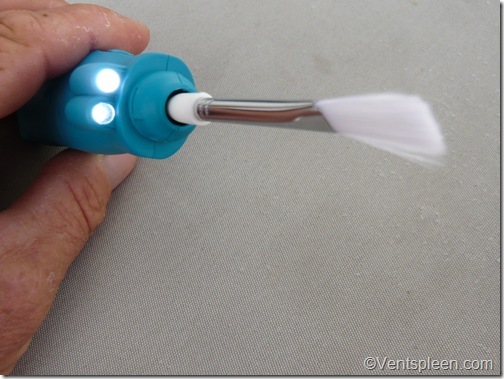
The first time I used it I was not overly impressed with the results but it did remove a lot of dust. The secret, I discovered is to only make one pass after each spin of the brush. If the bristles are charged to attract dust they soon seem to become discharged by the action of touching them on to the sensor. This is the impression that I have. In any case the answer is simple, just spin the brush for ten seconds before you touch the sensor with it. Once you have lifted the brush off the surface it will need to be spun and recharged again. This is easy to do. It has led lights built in but they are not brilliantly placed and the brush obscures their view somewhat. It also comes in a padded plastic storage box.
The built in leds on the Arctic Butterfly are not brilliantly placed.
The loupe is helpful at this stage. I use the Arctic Butterfly to remove the last few specs of dust that I can see. By starting in the corners and wiping towards the centre you can move or remove any dust easily. Then any dust that was not removed by the brush on that pass can be easily removed from the centre of the sensor.
This must sound like I work for Visible Dust or have something to gain by singing their praises but I promise you that I am just a humble customer with no connections to them in any way. What I have discovered in Visible Dust is a company who sell the best products for DIY sensor cleaning. From my experience they are only company that I have found who offer a complete solution. Every one of their products, from the cleaning products to the swabs to the blower and the arctic butterfly are excellent and WORK and that is all one can ask really.
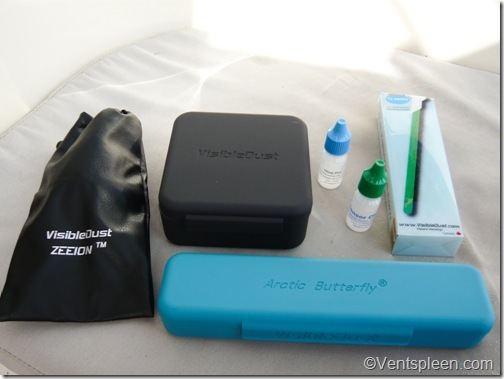
Here’s the bundle I bought for cleaning my sensor. Finally a system that works!
Yes it is expensive buying all this gear but it’s needed. It is as necessary to the modern photographer as a computer is. So my advice is don’t skimp on this. Cheaper products just don’t perform as well. You get what you pay for really seems to apply here.
Visible Dust offer various products either separately or as a bundle. I bought the Ultra Sensor Clean Arctic Butterfly 724 Super Bright Bundle It wasn’t cheap but frankly if I’d bought this in the first place my life would have been easier and I would not have wasted so much money on other lesser systems first. Save yourself some time and money and invest in the best. You’ll never regret it.
